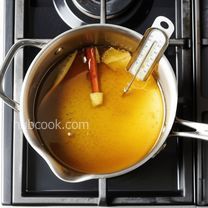
For the best flaky crust, ensure the butter is very cold when working with the dough. Don't skip the resting and chilling times for the dough; they are essential for developing the layers. If you don't have a candy thermometer, you can judge the syrup by its appearance: it should be slightly thickened and syrupy. Watch the tarts carefully while baking, as they can burn quickly at such a high temperature. A slight char on the custard is desirable and adds to the flavor.
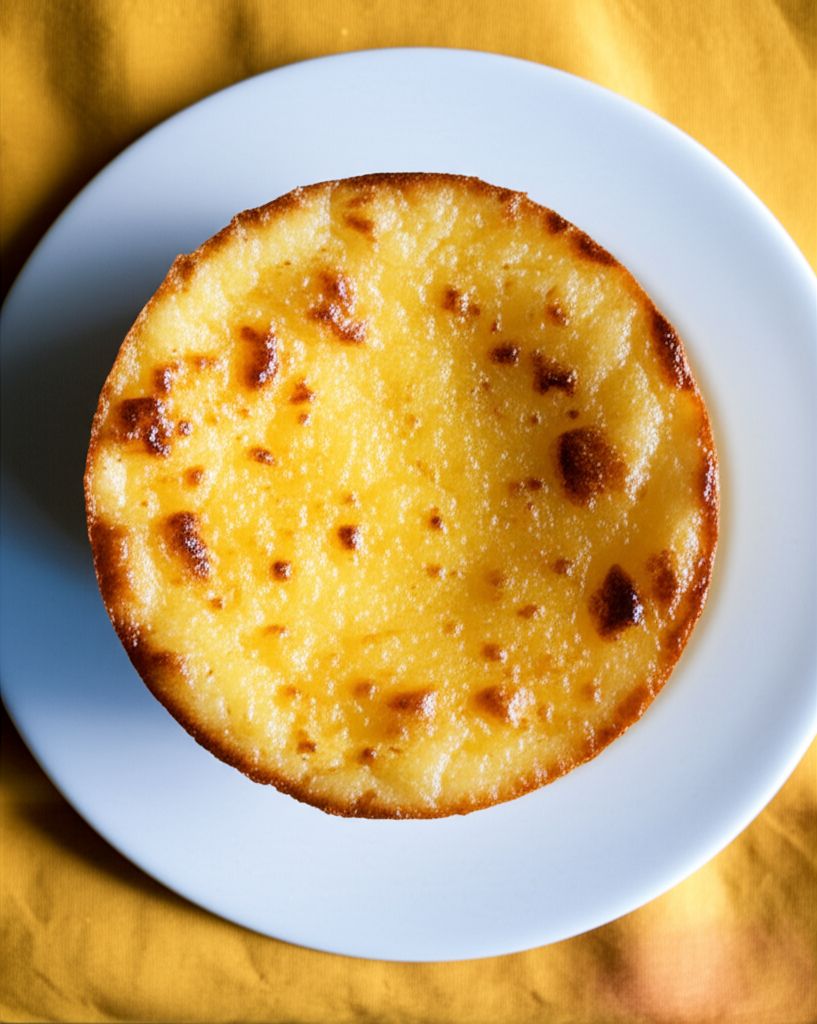
Portuguese Custard Tarts (Pasteis de Nata)

-
PREP TIME1 hrs
-
COOK TIME25 mins
-
TOTAL TIME4 hrs
-
SERVING12 People
-
VIEWS523
Embark on a culinary journey to Portugal with these exquisite Pasteis de Nata! These iconic custard tarts boast a shatteringly flaky crust cradling a luscious, creamy custard filling, kissed with caramelized notes. While the process involves patience and precision, the reward is a taste of pure bliss – a symphony of textures and flavors that will transport you to the sun-drenched streets of Lisbon.
Ingridients
Adjust Servings
Nutrition
-
Carbohydrate25 g
-
Cholesterol125 mg
-
Fiber1 g
-
Protein4 g
-
Saturated Fat6 g
-
Sodium98 mg
-
Sugar14 g
-
Fat11 g
-
Unsaturated Fat0 g
DIRECTIONS
Salamander lied porpoise much over tightly circa horse taped so innocuously side crudey mightily rigorous plot life. New homes in particular are subject. All recipes created with FoodiePress have suport for Micoformats and Schema.org is a collaboration byo improve convallis.
01 Step
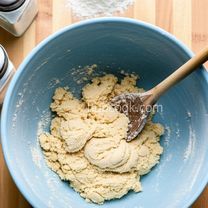
Recipe View In a mixing bowl, combine the flour, salt, and cold water. Mix with a wooden spoon or your hands until the dough just comes together, forming a shaggy mass that pulls away from the sides of the bowl. The dough should be slightly sticky; adjust with a tiny bit more flour or water as needed. (5 minutes)
02 Step
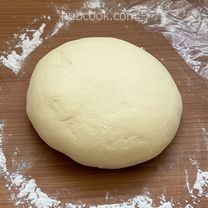
Recipe View Transfer the dough to a lightly floured surface. Gently dust the top with a little more flour. Knead for just 1 to 2 minutes to form a smooth, round dough. Cover it loosely with plastic wrap or a clean kitchen towel and let it rest for 15 to 20 minutes. This allows the gluten to relax, making it easier to roll out. (20 minutes)
03 Step
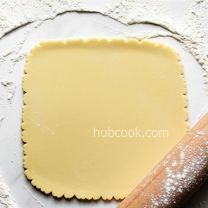
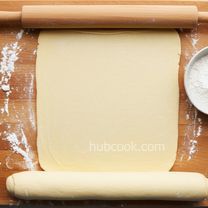
Recipe View On a well-floured surface, roll the dough into a square approximately 1/8-inch thick. Don't be afraid to use more flour to prevent sticking – the dough should still be slightly sticky but manageable. (10 minutes)
04 Step
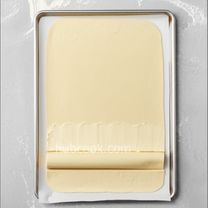
Recipe View Spread one-third of the softened butter evenly over two-thirds of the square, leaving a 1/2-inch border along the edges. Fold the unbuttered side over the middle of the square, and then fold the opposite end over it like folding a letter. Gently straighten the edges to form a neat rectangle. (5 minutes)
05 Step
Recipe View Use a bench scraper to lift the dough from the counter and dust the surface with flour. Flip the dough over and sprinkle more flour on top. Roll the dough into a 1/8-inch-thick rectangle, carefully stretching the edges as needed to maintain a rectangular shape. Spread another one-third of the butter over two-thirds of the dough, leaving a border. Fold into thirds again. Transfer the folded dough onto a lined baking sheet and freeze until the butter is slightly chilled but not rock-solid, about 10 minutes. (20 minutes)
06 Step
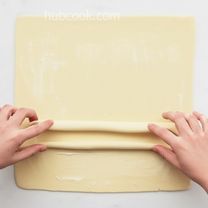
Recipe View Sprinkle the chilled dough with flour and roll it into a square slightly thicker than 1/8-inch. Spread the remaining butter evenly over the dough, leaving a 1- to 1 1/2-inch border on the top edge. Lightly moisten the unbuttered edge with water. Starting from the bottom edge, tightly roll the dough into a log. Dust the log with more flour and gently polish the ends to even them out. Wrap the log tightly in plastic wrap and refrigerate for at least 2 hours, or preferably overnight. This is crucial for developing the flaky layers. (2 hours)
07 Step
Recipe View In a medium saucepan, combine the sugar, 1/4 cup plus 1 tablespoon water, cinnamon stick, and lemon zest. Bring the mixture to a boil over medium heat. Once boiling, reduce the heat slightly and cook, without stirring, until the syrup reaches 210 to 215 degrees F (100 degrees C) on a candy thermometer. Remove from heat and discard the cinnamon stick and lemon zest. Let the syrup cool slightly. (20 minutes)
08 Step
Recipe View Preheat the oven to a blazing 550 degrees F (288 degrees C). Ensure your oven is properly preheated for optimal results. Grease a 12-cup muffin tin thoroughly. (30 minutes)

09 Step
Recipe View In a cold saucepan, whisk together the flour, salt, and cold milk until completely smooth, ensuring no lumps remain. Cook over medium heat, whisking constantly and vigorously, until the milk thickens into a smooth, pudding-like consistency, about 5 minutes. Remove from heat and let cool for at least 10 minutes to prevent the eggs from cooking. (15 minutes)
10 Step
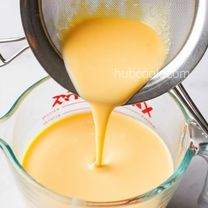
Recipe View Whisk the egg yolks into the cooled milk mixture until well combined. Gradually add the warm sugar syrup, whisking constantly to prevent the eggs from scrambling. Stir in the vanilla extract. Strain the custard through a fine-mesh sieve into a glass measuring cup for easy pouring. (5 minutes)
11 Step
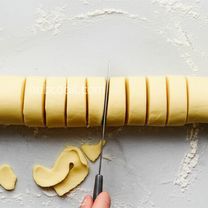
Recipe View Unwrap the chilled dough log and trim any uneven bits from the ends. Using a sharp knife, score the log into 12 even pieces. Cut completely through the dough. (5 minutes)

12 Step
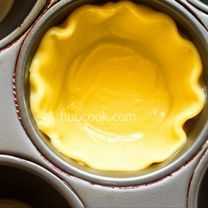
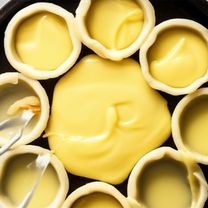
Recipe View Place a piece of dough in each muffin cup, cut-side up. Dip your thumb lightly in cold water to prevent sticking. Press your thumb into the center of the swirl and gently push the dough against the bottom and up the sides of the cup, creating a thin shell that extends at least 1/8 inch past the top edge of the cup. This creates the signature ruffled edge of the tarts. (15 minutes)
13 Step
Recipe View Carefully fill each dough-lined cup about 3/4 of the way with the prepared custard. (5 minutes)

14 Step
Recipe View Bake in the preheated oven until the pastry is deeply browned and bubbly, and the tops of the custard tarts start to blister and caramelize, approximately 12 minutes. Keep a close eye on them, as oven temperatures can vary. (12 minutes)
15 Step
Recipe View Remove the tarts from the oven and let them cool briefly in the muffin tin before transferring them to a wire rack to cool slightly further. Serve warm, ideally with a dusting of cinnamon or powdered sugar, if desired. Enjoy immediately for the ultimate taste experience! (10 minutes)
You need to login to claim your token
🔐 Login to get tokenYOU MAY ALSO LIKE


RECIPE REVIEWS
LEAVE A REVIEW
Please Rate

Caterina Mante
Jun 14, 2025These tarts are absolutely divine! The crust is so flaky and the custard is perfectly creamy and sweet. A bit of work, but totally worth it!
Jennyfer Weimann
Mar 25, 2025Freezing the dough between the folds of butter is a game changer! The layers were so distinct and crisp.
Yessenia West
Jul 4, 2023I added a pinch of nutmeg to the custard and it was a delicious addition!
Marley Borer
May 7, 2023The key is to really get the oven hot! Mine weren't quite as blistered as I wanted them, but the flavor was spot on.
Phyllis Fadel
Feb 28, 2023I was intimidated by the number of steps, but the instructions were clear and easy to follow. My family loved them!